
Applying Paint Protection Film (PPF) to your vehicle is a great way to preserve its paintwork and keep it looking new. However, it’s essential to perform paint correction before applying PPF.
Paint correction removes imperfections and enhances the paint’s clarity, ensuring the PPF adheres appropriately and provides the best protection. Let’s explore why paint correction is a necessary step before applying PPF.
Why Paint Correction is Necessary Before PPF
Surface Perfection
Eliminating Imperfections
Paint correction removes swirl marks, scratches, and other imperfections that would otherwise be sealed under the PPF.
These defects can be magnified once the film is applied, detracting from the vehicle’s appearance. Ensuring the paint is flawless before applying PPF makes a significant difference in the final look.
Enhanced Clarity and Shine
Corrected paint enhances the clarity and shine, ensuring the PPF showcases the paint’s true quality. A smooth and polished surface reflects light better, making the car look more vibrant and glossy under the protective film.
Better Adhesion
Smooth Surface
A smooth, corrected surface allows the PPF to adhere better, reducing the risk of bubbles and edge lifting. Imperfections in the paint can create small air pockets under the film, leading to poor adhesion and potential peeling over time.
Longer-Lasting Protection
Proper adhesion ensures the PPF stays in place longer, providing optimal protection. When the film adheres correctly, it forms a durable barrier against environmental contaminants, scratches, and minor abrasions, maintaining its protective qualities for years.
Steps for Paint Correction Before PPF
1. Initial Inspection
Assessing Paint Condition
Start by thoroughly inspecting the paint for imperfections such as swirl marks, scratches, and oxidation. Use good lighting and, if possible, a paint thickness gauge to determine the severity of the defects and the amount of correction needed.
Planning the Correction
Based on the condition of the paint, plan the level of correction required. This involves deciding on the type of compounds and polishes you will need, and the time it will take to complete the process.
2. Surface Preparation
Washing and Decontaminating
Wash the car thoroughly to remove dirt and grime. Use a high-quality car shampoo and follow up with a clay bar to remove embedded contaminants from the paint surface. This step is crucial for preparing the paint for correction.
Drying
Dry the vehicle completely using clean microfiber towels. Ensure no moisture is left on the surface, which can interfere with the correction process.
3. Paint Correction Process
Selecting Polishing Compounds
Based on the condition of the paint, choose appropriate compounds and polishes. For example, use a heavy-cut compound for deep scratches and a finishing polish for minor imperfections. Selecting the right products is critical to effective paint correction.

✔ Showroom Shine, Fast – Delivers a mirror-like finish by removing scratches, swirls, water spots, and acid rain etching in seconds.
✔ Professional-Grade Cutting Power – Uses exclusive Super Micro-Abrasive Technology to eliminate 1200 grit sanding marks or finer with ease.
✔ Safe for All Paint Finishes – Body-shop-safe formula that works on all paint types, including modern clear coats.
✔ Flexible Application – Can be applied by hand, DA polisher, or rotary buffer—ideal for DIYers and pros alike.
✔ Pairs Perfectly with M205 Finishing Polish – Use as the first step in a two-step process for stunning clarity and gloss.
Using a Dual-Action Polisher
A dual-action polisher is used to apply the compounds and polishes. Work in small sections to ensure even correction. The dual-action polisher helps to reduce the risk of damaging the paint and ensures a uniform finish.
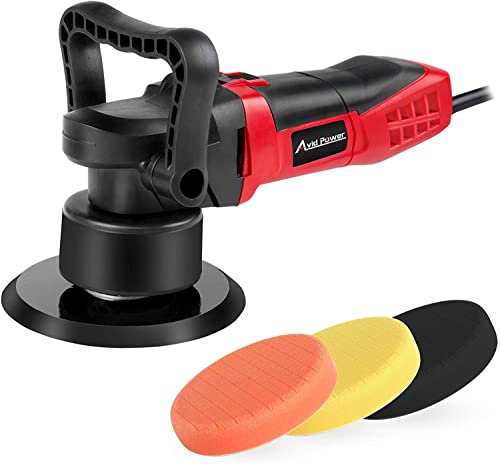
✔ Versatile Detailing Tool – Ideal for removing swirls, scratches, and oxidation from all painted surfaces—and even handles light sanding on wood or metal.
✔ 6-Speed Variable Control – Adjusts from 1500 to 6800 RPM for waxing, polishing, cleaning, or serious paint correction.
✔ Comfortable, Slip-Free Grip – Rubberized body and adjustable D-handle provide solid control and reduce fatigue during long sessions.
✔ Swirl-Free Dual Action Motion – Random orbital movement delivers pro-level shine without burning paint or leaving marks.
✔ Complete Kit Included – Comes with 3 foam pads, backing plate, D-handle, wrench, spanner, and manual—ready to go out of the box.
4. Technique and Pressure
Apply consistent pressure and use overlapping passes to ensure thorough correction without damaging the paint. Be patient and methodical, as rushing the process can lead to uneven results or additional imperfections.
5. Inspecting Work
After each section, inspect the paint to ensure imperfections are removed. Reapply polish if necessary to achieve the desired finish. The proper inspection helps identify areas that might need extra attention.
6. Final Steps Before PPF Application
Removing Residual Oils
Wipe down the corrected surface with isopropyl alcohol (IPA) to remove any polishing oils that could interfere with PPF adhesion. This step ensures that the surface is clean and ready for the film application.
Final Inspection
Perform a final inspection under different lighting conditions to ensure all imperfections are addressed. This thorough check ensures that the paint is in perfect condition before the PPF is applied.
Common Mistakes to Avoid
1. Skipping the Correction Process
One of the biggest mistakes is skipping the paint correction process. If you apply PPF over a paint surface that hasn’t been corrected, imperfections such as scratches, swirl marks, or oxidation will be sealed.
These defects will remain visible and can detract from the vehicle’s overall appearance, making the PPF less effective in showcasing the paint’s true quality.
2. Improper Polishing Techniques
Using incorrect polishing techniques can cause holograms and buffer trails. These are unsightly marks that appear when the polisher is not used correctly. If these issues are not corrected before applying the PPF, they will be permanently sealed under the film, making them difficult to remove and spoiling the finish.
Applying PPF After Paint Correction
Preparation for PPF
Clean and Dust-Free Environment
Ensure the application area is clean and free of dust to prevent contaminants from getting under the PPF. Even tiny particles can cause bubbles or imperfections under the film, so maintaining a sterile environment is crucial for a smooth application.
Temperature Control
Apply PPF in a controlled environment with a stable temperature. Ideal temperatures range between 65°F and 75°F, which helps the film adhere properly and prevents issues related to temperature fluctuations.
PPF Application Process
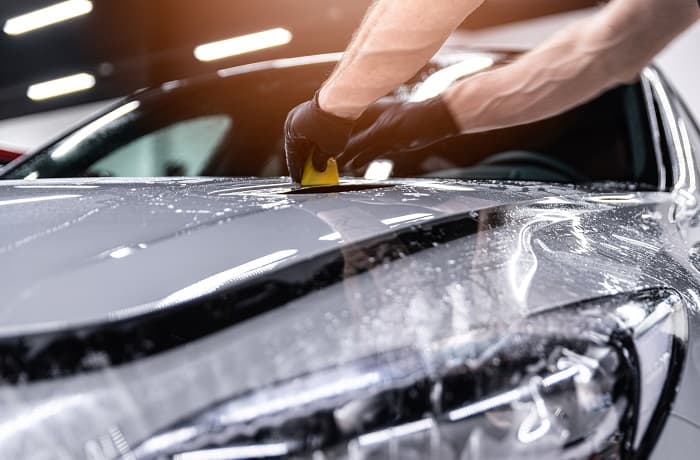
Positioning and Application
Carefully position the PPF on the vehicle’s surface. Use a slip solution, typically a mixture of water and a few drops of baby shampoo, to help adjust the film and ensure perfect alignment.
Once positioned, use a squeegee to remove air bubbles and ensure a smooth application. Start from the center and work outwards to push out any trapped air or moisture.
Edge Sealing
Seal the edges properly to prevent lifting and ensure long-term protection. Use a specialized edge sealant recommended by the PPF manufacturer.
This step helps reinforce the edges, keeping them firmly adhered and preventing dirt or water from getting under the film.
Conclusion
Paint correction is essential before applying PPF to ensure a smooth, flawless finish. Correcting the paint removes imperfections, enhances shine, and allows the PPF to adhere better.
Proper preparation and application techniques result in long-lasting protection and a stunning appearance. By avoiding common mistakes and following the right steps, you can achieve optimal results and keep your vehicle looking its best.