
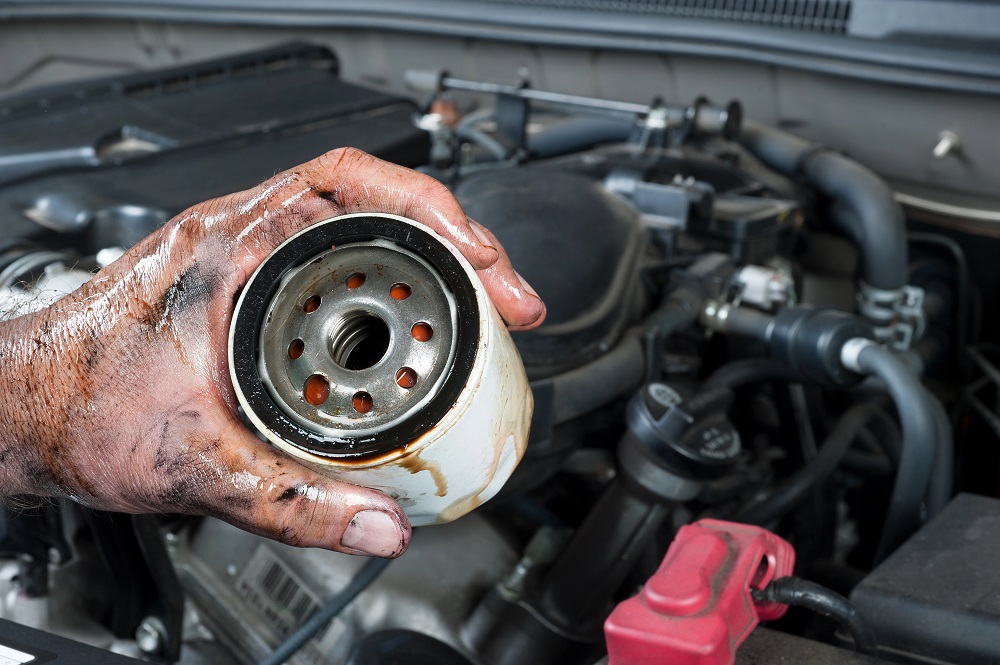
You’re under the car, ready to swap out the oil filter, but something’s not right. The housing won’t budge. You crank harder, and the wrench starts slipping. If you keep going, that plastic or aluminum cap might crack, turning a routine oil change into a headache.
Toyota’s cartridge-style oil filter system is great for long-term durability, but it has one common issue—housings that refuse to come off.
Whether it’s overtightening, heat expansion, or a stubborn O-ring seal, getting it unstuck requires the right approach. For older Toyota models with spin-on filters, seized adapters and corroded threads can cause just as much trouble.
Before you risk breaking something, let’s go over what’s locking it in place and how to free it safely—without resorting to brute force.
1. Cartridge-Style Housing: Why It Gets Stuck and How to Free It
Toyota’s switch to a cartridge-style oil filter in many models (like the Camry, RAV4, Highlander, and Tacoma) made filter swaps more eco-friendly, but it also introduced a new frustration—housings that refuse to budge.
Whether it’s a plastic or aluminum version, overtightening, heat expansion, or a dried-out O-ring can lock it in place. Forcing it off the wrong way can crack the housing, strip the hex, or even damage the engine’s filter seat.
Let’s break down why this happens and how to remove it without breaking anything.
Overtightened or Heat-Bonded Housing
A tight fit is good, but Toyota’s plastic housings can bond to the engine block over time. Heat cycles expand and contract the housing, pressing the O-ring into the seating surface. If the last oil change involved overtightening, the result is a filter housing that feels cemented in place.
What You’ll Notice:
• The filter housing won’t budge, even with a properly sized oil filter wrench.
• Creaking or cracking sounds when applying torque (a sign the plastic is under stress).
• Burnt or dried oil residue around the housing threads, indicating it’s practically fused to the block.
How to Remove It Safely:
1. Use the Right Tool – Toyota’s cartridge filters require a 64mm or 65mm cap-style oil filter wrench. Universal strap wrenches can crush the housing, making things worse.
2. Apply Even Torque – Use a breaker bar instead of a short-handled wrench for controlled force.
3. Heat the Housing Base (Carefully!) – If it’s stuck due to expansion, use a heat gun (low setting) on the engine-side metal portion for 30–60 seconds. This helps expand the metal while the plastic stays relatively cool, breaking the bond.
4. Try a Quick Shock Release – A sudden, firm jolt with the wrench instead of gradual pressure can sometimes crack the seal loose.
If It Still Won’t Budge:
• If you hear plastic cracking, stop. The hex might be rounding off, which means you’ll need an extraction tool or filter pliers for last-resort removal.
• If plastic shavings appear, replace the housing—it won’t survive another removal.
Once it’s off, always hand-tighten the new housing to spec (18–20 lb-ft) and lubricate the O-ring to prevent this from happening again.
2. Spin-On Adapter and Metal Housing Seizures: When Corrosion Locks It in Place
Toyota’s older models, particularly trucks and SUVs from the ’90s and early 2000s, often use a spin-on oil filter adapter or a metal housing that screws directly into the block.
While these setups avoid the plastic cracking issues of newer cartridge-style filters, they bring their own headache—corrosion that fuses the adapter in place.
If your filter housing won’t budge and you’re dealing with rust, oxidation, or a filter that feels welded to the engine, here’s how to get it off without damaging the threads.
Why It Gets Stuck
• Heat and moisture cause oxidation between the aluminum or steel housing and the engine block.
• Dissimilar metals (aluminum housing, steel block) lead to galvanic corrosion, bonding the threads over time.
• Over-tightening during installation makes it worse by compressing the metal-to-metal contact.
What You’ll Notice:
• No movement at all when trying to remove it, even with a strong grip.
• A gritty, grinding sensation when force is applied (a sign of thread corrosion).
• Visible rust or white oxidation around the base of the housing.
How to Free It Without Stripping the Threads:
1. Penetrating Oil Is Your Best Friend – Spray a product like PB Blaster or Kroil directly at the base of the housing. Let it soak for 15–30 minutes to break down corrosion.
2. Use a Breaker Bar or Heavy-Duty Filter Wrench – If a standard oil filter wrench isn’t cutting it, upgrade to a grip-style or claw-style wrench for extra leverage.
3. Apply Shock Force – A quick, sharp jolt (rather than slow pressure) can break the corrosion bond. Use a rubber mallet on the wrench handle to provide a shock release.
4. Gentle Heat Treatment – If the housing still won’t move, apply a heat gun (medium setting) for about 30 seconds on the engine block side, not the housing itself. Expanding the metal block slightly can loosen the grip.
If Nothing Works:
• If the filter housing absolutely refuses to move, the last option is a careful cut-and-peel method. Using a small cutting wheel or chisel, cut a notch into the housing, then pry it loose section by section.
• After removal, inspect the threads carefully. If they’re damaged, you may need to chase the threads with a tap to restore them before installing the new housing.
Once replaced, apply anti-seize lubricant to the threads to prevent the issue from happening again. Also, make sure to torque the housing correctly (usually 18–20 lb-ft, or hand-tight plus a quarter turn).
3. Stripped or Rounded Hex Edges: When the Oil Filter Housing Has No Grip Left
If you’ve ever reached for an oil filter wrench, only to feel it slip and spin on the housing without budging, you’re dealing with rounded hex edges. This is a common issue on 2010+ Toyota models with plastic cartridge-style oil filter housings.
The problem?
• Using the wrong size wrench (many universal tools don’t fit snugly).
• Applying too much force with a breaker bar, which distorts the plastic.
• Heat cycles and oil residue weakening the housing over time.
Once the hex edges are rounded, standard cap wrenches won’t grip. So, how do you get it off without breaking the housing entirely?
How to Remove a Rounded Toyota Oil Filter Housing
1. Try a Heavy-Duty Filter Wrench First
Before jumping to destructive methods, test a reinforced metal cup wrench (like an OEM or Lisle 64mm wrench) with firm downward pressure to force engagement. If it still slips, move to stronger solutions.
2. Use an Oil Filter Pliers or Jaw-Type Wrench
• For slightly rounded edges, large channel-lock pliers or an adjustable jaw-style oil filter wrench can bite into the sides and break it free.
• Clamp as close to the base as possible to avoid cracking the housing.
3. Tap in a Socket for an Emergency Grip
• If the hex edges are completely gone, hammer a slightly smaller socket (like a 63mm instead of 64mm) onto the housing.
• This creates a temporary gripping surface for a ratchet or breaker bar.
4. The Last Resort—Cut It Off
If nothing works, cutting away the housing in controlled sections is the only solution.
• Use a Dremel or oscillating tool to slice through the top plastic cap of the housing.
• Once open, remove the internal oil filter and cut away remaining portions until the threaded section is free.
Preventing a Stuck Housing Next Time
• Always torque to spec (18-20 lb-ft for most Toyota cartridge housings).
• Use fresh oil on the O-ring before installation—dry O-rings can seize.
• Consider switching to an aluminum housing if repeated issues occur.
4. When the O-Ring or Gasket Creates a Vacuum Seal
Sometimes, the oil filter housing isn’t just stuck—it’s fused to the engine block. If you feel like you’re fighting against an invisible force, it’s probably a vacuum lock caused by the O-ring.
This happens when:
• The O-ring wasn’t lubricated before installation, causing it to “stick” to the block.
• It was over-tightened, crushing the O-ring and making it weld itself to the metal.
• Heat cycles hardened the rubber, creating a suction effect that prevents movement.
Unlike a rounded housing where the tool just spins, a vacuum-locked housing won’t budge at all, even with steady force.
How to Break the Vacuum Seal and Free the Housing
1. Loosen the Housing in Small Increments
Instead of trying to crank it loose in one motion, apply steady pressure and “wiggle” it slightly back and forth. Even the slightest movement can help break the O-ring’s grip.
2. Use a Thin Pry Tool or Plastic Wedge
• Slide a thin plastic trim tool or small wedge between the O-ring and block to break the suction effect.
• Avoid using metal tools, as they can gouge the mating surface and cause future leaks.
3. Apply Heat to the Metal Base (Not the Plastic!)
• If the filter housing still won’t move, use a low-heat setting on a heat gun to slightly expand the metal where the O-ring sits.
• Do not heat the plastic housing directly, or it may warp.
4. Puncture the Housing (Last Resort)
• If the vacuum seal won’t break, drilling a small hole in the housing can relieve internal pressure.
• Once punctured, oil may drip out, signaling that the suction effect is releasing.
• From here, you can continue with normal removal methods.
Preventing This Issue in the Future
• Always lightly coat the new O-ring with fresh oil before installing it.
• Follow OEM torque specs—too much force compresses the O-ring too tightly.
• If your housing gets stuck often, inspect the mating surface for buildup and clean it before reinstalling.
5. When the Metal Filter Adapter is Stuck to the Block
In some cases, it’s not just the oil filter housing that’s giving you trouble—it’s the metal filter adapter itself. This is more common in older Toyota models that originally used spin-on filters but had an aftermarket or factory-installed adapter to convert them to cartridge-style filters.
Over time, corrosion, heat cycles, and over-torquing can make the adapter seize onto the block. If you’ve removed the filter housing, but the adapter won’t budge, here’s how to deal with it.
Signs the Filter Adapter is Stuck
• The housing is off, but oil still drips from the base, and a metal ring is visible.
• You try to unscrew the adapter, but it feels like it’s fused to the block.
• The adapter spins freely but won’t detach—this could mean it’s cross-threaded.
• There’s visible rust or gunk buildup at the contact point.
How to Remove a Seized Filter Adapter
1. Try a Strap Wrench or Breaker Bar
• If the adapter is threaded in, use a strap wrench or breaker bar with steady force.
• Avoid jerky motions—sudden force can strip the threads.
2. Use Penetrating Oil and Let It Soak
• Apply a high-quality penetrating oil (like PB Blaster or Kroil) to the adapter’s base.
• Let it soak for at least 15–30 minutes, then attempt removal again.
3. Tap Around the Edges with a Rubber Mallet
• Lightly tapping the adapter can break loose corrosion that might be holding it in place.
• Be careful not to dent or deform the metal, or it may become even harder to remove.
4. Apply Gentle Heat
• A low-heat setting on a heat gun can help expand the metal slightly and loosen the grip.
• Avoid using an open flame—this area contains oil residue and rubber seals.
5. Last Resort: Cut It Off
• If the adapter won’t unscrew at all, you may need to carefully cut a notch in it using a rotary tool or hacksaw.
• Once notched, use a flathead screwdriver and a mallet to turn it loose.
• Be extremely cautious—damage to the block threads can create a major issue.
Reinstalling or Replacing the Adapter
If the adapter came off in one piece and the threads are intact:
• Clean the mating surface thoroughly to remove any rust or debris.
• Apply a light coat of anti-seize to prevent future sticking.
• Torque it to spec—over-tightening is often what causes it to seize in the first place.
If the adapter was damaged during removal, you’ll need to:
• Replace it with a new OEM or high-quality aftermarket adapter.
• Inspect the block threads before installing a new one—damaged threads could cause leaks.
Wrapping It Up
By now, your filter housing should be off, and you’re ready for a clean reinstallation. The key is patience—forcing it can lead to expensive repairs. Next time, a little prep work will save you the trouble.”
Was This Article Helpful?

Rami Hasan is the founder of CherishYourCar.com, where he combines his web publishing experience with a passion for the automotive world. He’s committed to creating clear, practical guides that help drivers take better care of their vehicles and get more out of every mile.