
A smooth, glossy, clear coat gives your car that perfect, shiny finish. But sometimes, after applying a clear coat, it feels rough and gritty, like sandpaper.
This can be frustrating, especially after spending time and effort on the job. Understanding why this happens and how to fix it can save you a lot of trouble.
Let’s explore the common causes of a rough, clear coat and how you can achieve that smooth, flawless finish you aim for.

Causes of a Rough, Sandpaper-Like Clear Coat
1. Improper Application
Contaminants in the Air
Dust, dirt, or debris in the air during application can settle on the wet clear coat, creating a rough texture. Even the smallest particles can ruin the smooth finish you aim for, so working in a clean environment is essential.
Incorrect Spraying Technique
An improper spraying technique, such as holding the spray gun too far from the surface or moving it too quickly, can lead to an uneven application. This can cause the clear coat to dry unevenly, resulting in a rough, gritty surface.
2. Environmental Factors
High temperatures or humidity levels can cause the clear coat to dry too quickly or poorly level out, leading to a rough surface.
To avoid these issues, applying the clear coat in conditions within the recommended temperature and humidity range is essential.
3. Surface Contamination
Not thoroughly cleaning the base coat before applying the clear coat can result in a rough texture due to residual contaminants. Any leftover dirt, oil, or wax can interfere with the clear coat’s adhesion and smoothness.
Diagnosing the Problem
1. Visual Inspection
Identify Particles
Look closely at the clear coat to identify if the roughness is due to embedded particles or other surface contaminants. Use a bright light to help spot any dirt, dust, or debris trapped in the clear coat.
Check for Uniformity
Determine if the rough texture is consistent across the entire surface or localized to specific areas. This can help pinpoint whether the issue was due to a widespread problem, such as environmental factors, or a localized issue, such as surface contamination.
2. Touch Test
Gently run your fingers over the clear coat to feel for rough patches, confirming the sandpaper-like texture. This tactile inspection helps you understand the extent and severity of the problem.
Solutions to Smooth a Rough Clear Coat
1. Wet Sanding
Materials Needed
You’ll need fine-grit sandpaper (1500 to 2000 grit), a spray bottle with water, and a soft sanding block to smooth the clear coat. These materials will help you achieve a smooth, even finish without damaging the clear coat.
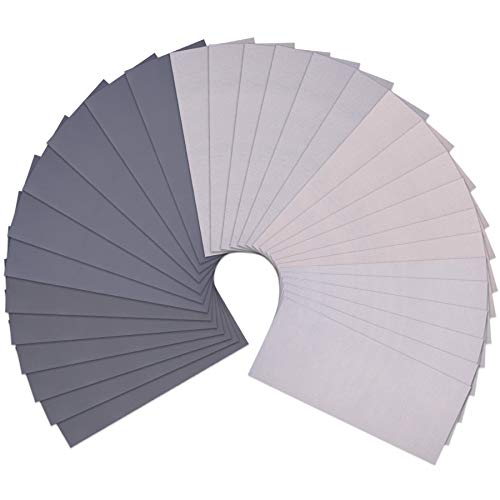
✔ Comprehensive Grit Selection – Includes 30 sheets with 5 high grits: 2000, 3000, 5000, 7000, and 10000, giving you the range needed for ultra-fine polishing and finishing.
✔ Generous Size and Flexible Use – Each sheet measures 9" x 3.6", easy to use by hand, with a sanding block, or cut down to fit specific project needs.
✔ Wet or Dry Application – Crafted from high-quality silicon carbide with nano-sand-planting technology, ideal for use with water, oils, varnish, shellac, or lacquer.
✔ Durable and Smooth Handling – Features a soft, electroplated backing for easy sanding without cracking, tearing, or losing grit.
✔ Versatile Polishing Set – Perfect for fine finishing on metal, wood, plastic, stone, jade, leather, and automotive projects.
Sanding Process
Soak the sandpaper in water and gently wet sand the clear coat, keeping the surface wet to prevent scratches. Sand in a back-and-forth motion, applying light pressure until the surface feels smooth. Regularly check your progress by wiping away excess water and dust.
2. Polishing
Compounding
After wet sanding, use a rubbing compound with a dual-action polisher to remove sanding marks and restore gloss. Apply the compound to a polishing pad and work it into the surface in small, overlapping sections until the entire area is polished.

✔ Powerful Defect Removal – Quickly eliminates scratches, heavy swirls, acid rain etching, and sanding marks down to 1200 grit.
✔ Ultra-Fast Cutting Action – Delivers professional-level results in less time with Meguiar’s exclusive micro-abrasive technology.
✔ Smooth, High-Gloss Finish – Leaves a refined surface ready for polishing—perfect for prep before waxing or coating.
✔ Clear Coat Safe – Designed for use on all glossy paint types, including modern clear coat finishes.
✔ Versatile Application – Can be used by hand, DA polisher, or rotary buffer—safe for body shops and detailing professionals.
Finishing Polish
Follow up with a finishing polish to enhance the clarity and shine of the clear coat. This step helps to refine the surface further and achieve a mirror-like finish. Use a clean polishing pad and apply the polish in the same manner as the rubbing compound.

✔ Showroom Shine, Fast – Delivers a mirror-like finish by removing scratches, swirls, water spots, and acid rain etching in seconds.
✔ Professional-Grade Cutting Power – Uses exclusive Super Micro-Abrasive Technology to eliminate 1200 grit sanding marks or finer with ease.
✔ Safe for All Paint Finishes – Body-shop-safe formula that works on all paint types, including modern clear coats.
✔ Flexible Application – Can be applied by hand, DA polisher, or rotary buffer—ideal for DIYers and pros alike.
✔ Pairs Perfectly with M205 Finishing Polish – Use as the first step in a two-step process for stunning clarity and gloss.

✔ Polish + Finish in One Step – Designed to remove minor swirls and scuffs while leaving behind a high-gloss, swirl-free shine.
✔ Ideal for One-Step Cleaners – Perfect balance of light cutting and finishing performance—great for applying cleaner waxes and all-in-one polishes.
✔ Hex-Logic Pattern for Even Results – Unique hex grooves hold and spread product evenly, ensuring a smooth and consistent finish.
✔ Durable PUR+ Backing – Built for longevity with a resilient backing plate that stays secure through multiple uses and washes.
✔ Covers More Area with Less Heat – 6.5" size and "V" profile design protect against accidental contact and manage surface temperatures more efficiently.
3. Reapplication
Surface Preparation
If sanding and polishing do not yield satisfactory results, consider reapplying the clear coat. Thoroughly clean and sand the existing clear coat to create a smooth base. This ensures the new layer adheres appropriately and provides a smooth finish.
Controlled Environment
Apply the clear coat in a clean, dust-free environment with controlled temperature and humidity to prevent contamination. This helps avoid the issues that cause the rough texture and ensures a flawless application.
Preventive Measures
1. Proper Environment Setup
Clean Work Area
Ensure the painting area is clean and free of dust. If available, use a dust extraction system to minimize airborne particles. Regularly clean the workspace to maintain a contamination-free environment.
Control Temperature and Humidity
As the clear coat manufacturer recommends, maintain optimal temperature and humidity levels during application. This helps the clear coat dry and level out properly, avoiding issues caused by extreme environmental conditions.
2. Application Technique
Correct Spraying Distance and Speed
Follow the manufacturer’s spray gun distance and movement speed guidelines for an even coat. Typically, holding the spray gun 6-8 inches from the surface and moving it steadily ensures proper application.
Multiple Thin Coats
Apply multiple thin coats rather than one thick coat for better leveling and a smoother finish. Each thin layer gradually builds up the clear coat, reducing the risk of runs, sags, and rough texture.
Conclusion
A clear coat that feels like sandpaper can be caused by contaminants, improper application, or environmental factors. To fix it, try wet sanding and polishing or reapplying the clear coat in a controlled environment.
Maintaining a clean workspace, controlling temperature and humidity, and using proper spraying techniques will prevent future issues and help you achieve a smooth, glossy finish on your vehicle.