If your Lexus IS250 is starting to show its age, a bumper conversion is one of the sharpest ways to bring it back to life, without dropping cash on a new car.
Whether you’re trying to mimic the meaner front-end of a 2021 F-Sport or just want something a little more aggressive than stock, this isn’t just a cosmetic move—it’s a statement.
From bolt-on kits that practically snap into place to more complex setups that require a bit of elbow grease and creativity, there are more options than ever for second-gen IS owners (2006–2013).
But it’s not all smooth sailing. Costs add up. Sensor compatibility gets tricky. And if your state has bumper height laws, the wrong lip might get you in trouble.
This guide lays it all out: from kit comparisons and install tips to paint costs and real-world feedback from owners who’ve done it all before. If you’re serious about upgrading your IS250’s look and doing it right the first time, you’re in the right place.
1. Why Swapping Bumpers Might Be the Best Thing You Do for Your IS250
Modern Looks Without the New Car Price Tag
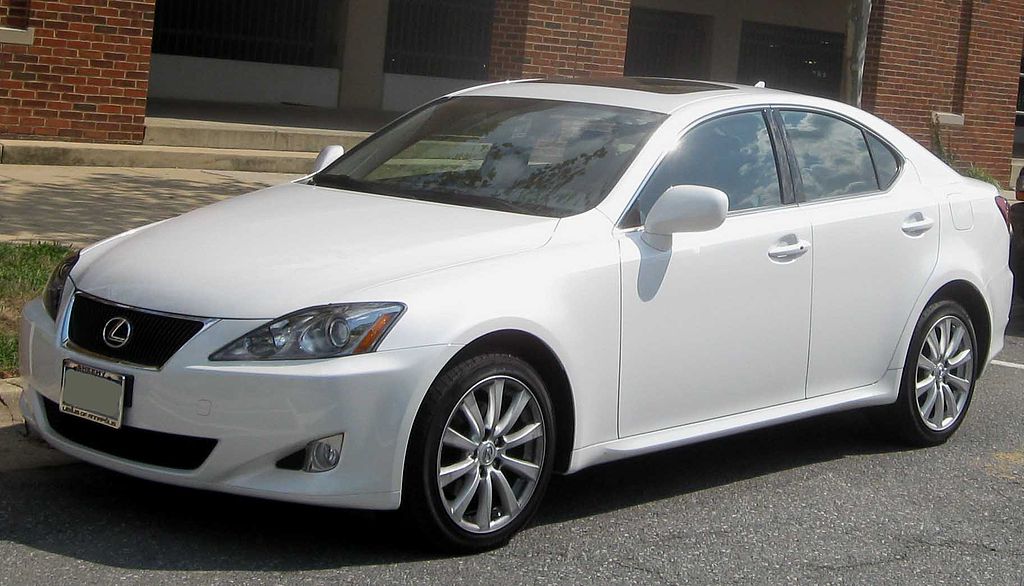
Your IS250 might run like a dream, but the front end? It’s starting to look a bit tired, especially parked next to newer Lexus models.
A bumper conversion is a clean way to give your car the sharper, more angular lines of a 3IS or 4IS F-Sport without committing to a whole new ride. It’s like slipping your car into a tailored suit—it instantly looks updated, leaner, and ready to turn heads.
Chase the F-Sport Swagger or Go Full Custom
Most owners aim for that signature F-Sport style: aggressive lower grilles, wide fog bezels, and crisp body lines that scream modern Lexus.
But if you’re the type who wants to stand out, there’s more than one flavor out there. LC-inspired conversions add a sleek coupe vibe, while Japanese aero kits like Esprit’s Premiere bumpers bring a true tuner look few others have.
More Than Just Looks—Small Gains with Real Effects
While the change is mostly visual, some bumpers offer functional perks too. Wider grilles and splitters can bump up airflow to your radiator and brakes.
It won’t turn your IS into a track monster, but on hot days or highway runs, that added cooling and airflow stability can be a nice bonus. Plus, a sharper look often means higher resale value—it’s a subtle mod that makes your IS feel years newer.
2. What’s Out There? Your IS250 Conversion Options, Explained
Direct-Fit Kits That Snap Into Place
If you’re going for a plug-and-play experience, direct-fit aftermarket kits are your friend. These are designed to bolt right onto your 2006–2013 IS250 without weird gaps or hours of grinding. Want that sharp, wide-mouth 4IS F-Sport look from 2021?
Brands like Car-Act and YHB offer PP plastic kits that come with the grille, lower lip, fog bezels, and weigh in around 17 pounds. These kits nail the modern Lexus face and include the finer details, like pre-cut fog light mounts and badge-ready grilles.
There’s also a healthy market for 3IS-style kits (2014–2020). These slide onto the 2IS chassis with some adjustment and often give you that aggressive F-Sport front without requiring major fabrication. Some vendors even offer plug sets for sensor holes, making them cleaner for cars without parking sensors.
One-Off and Wild: LC and Esprit-Inspired Swaps
Not all conversions aim for a factory upgrade. Some chase head-turning looks that make people stop and stare. The LC-style bumper from Car-Act swaps your sedan’s corporate face for a sculpted coupe vibe—swoopy, lower-slung, and totally unique.
Then there’s the Esprit Premiere Japan kit, a tuner-focused option with functional splitter planes and FRP construction that keeps things light. You’ll stand out at meets—just expect to do more work fitting them.
OEM Mix-and-Match Moves
You can also get creative with OEM parts. Swapping a 2012 bumper onto a 2006 IS250 is doable—but it’s not just the bumper you’ll need. Think brackets, fogs, fender liners, and crash foam. These conversions stick closer to stock lines, which might help with inspections or sensor compatibility. But they’re rarely bolt-on. It’s a parts puzzle—and it only works when all the right pieces click into place.
3. Side-by-Side Showdown: Which Kit Brings the Best Bang for Your Buck?
Choosing a bumper conversion isn’t just about looks—it’s about what you’re actually getting in the box, how clean the fitment will be, and whether you’ll need to chase down extra parts later. This cheat sheet breaks it down:
| Style / Vendor | Years Covered | Core Pieces in Box | Typical Street Price | Notes |
| 4IS 2021 F-Sport (Car-Act) | 06–13 | PP bumper shell, mesh grille, fog bezels, lip | ~$560 | Direct bolt-on; ~17 lb; strong visual upgrade |
| 3IS 2014 F-Sport (Ikon) | 06–13 | Bumper, grille, lower lip | ~$480–650 | No PDC holes by default; sturdy PP build |
| IS-F rear dual-exit (Ikon) | 06–13 | Rear cover only | ~$350–450 | Needs dual-tip exhaust to match |
| LC-style front (Car-Act) | 06–12 | FRP bumper, LC mesh | ~$650–800 | Light, sharp—paint required, fit needs finesse |
These are kit-only prices. You’ll need to add paint, potential sensor integration, and labor to the final tally, but this gives you a clear sense of where each style sits in terms of value and complexity.
4. Beyond Looks: What These Kits Change Under the Surface
Swapping bumpers on your IS250 isn’t all about cosmetics—there are subtle changes happening under the paint, especially when it comes to airflow, weight balance, and brake cooling potential. Here’s what matters.
Aero Gains That Make a Difference—Sort Of
Some kits, especially those modeled after the F-Sport or Esprit styles, come with aggressive lower lips and splitters. These aren’t just for show.
At highway speeds, they can help manage airflow under the car and reduce front-end lift slightly. It’s not race-car territory, but you might notice steadier handling in crosswinds or improved fuel efficiency on longer drives.
Weight Swaps: Lighter Isn’t Always Better
Most of the high-quality PP (polypropylene) kits are roughly equal in weight to your stock bumper. But when you dip into the FRP (fiber-reinforced plastic) kits—like the LC-style options—you might save a couple of pounds.
Then again, if your new bumper includes lips, fog bezels, or metal brackets, that weight savings could vanish fast. For example, a typical PP kit might land around 17 lb, while a barebones FRP shell can weigh as little as 12–14 lb.
Cooling the Brakes or Choking the Radiator?
Some kits leave open channels for brake ducts or extra radiator airflow, especially those modeled after track-focused variants. But not all kits come functional out of the box.
You may need to trim plastic backing or rig up a duct behind the bumper to actually send air where it counts. If you plan to track the car or drive aggressively in hot climates, those open ducts might be worth activating.
5. Watch for These Snags Before You Wrench
Not every bumper swap is as plug-and-play as the ads claim. Even “bolt-on” kits can come with fitment curveballs, sensor headaches, or unexpected alignment issues. Let’s break down the big ones that trip people up.
Parking Sensors and the “Check Sonar” Surprise
Plenty of IS250 owners run into issues when their new bumper doesn’t come pre-drilled for parking sensors (PDC). If the holes are off by even a few millimeters, you’ll get the dreaded “Check Sonar” message on the dash—and the system won’t function properly.
Some kits give you plug blanks or templates, others leave you to measure and drill on your own. If precision’s not your thing, get this done by a shop.
Headlight Washer Gaps and Missing Cutouts
Converting to an F-Sport or LC-style bumper can sometimes mean deleting headlight washer holes altogether. That’s fine if your state doesn’t check, but in some areas (like California and parts of the EU), no washers on HID headlights can be an inspection fail. Double-check whether your kit keeps the washers or deletes them entirely.
Fender Liners, Crash Bars, and Awkward Gaps
Swapping to a newer-gen look might throw off your fender liner alignment. You may need to trim, heat, or even replace them depending on the bumper’s contour.
Some bumpers also don’t clear the stock crash bar cleanly—especially FRP shells—so a few washers or bracket tweaks might be needed to get everything flush. If you’ve got uneven panel gaps after install, this is likely why.
Paint-Match Roulette with Pre-Sprayed Kits
Tempted by a pre-painted bumper? You’re not alone—it’s convenient, and sometimes cheaper. But paint codes don’t tell the whole story. If your IS250’s been resprayed or faded over time, that “matching” bumper might show up with a slightly different tone.
Metallics and pearls are especially tricky. Most forum veterans suggest paying a bit extra for local paint and blending if you want it perfect.
6. What’s It Gonna Cost? Your Bumper Conversion Budget Breakdown
Swapping bumpers on your IS250 can swing from a $1,100 backyard project to a $2,600 shop job—depending on how wild you go. Let’s break down the numbers so you’re not blindsided halfway through.
The Kit Itself: Style Drives the Price
Most complete conversion kits (bumper cover, grille, fog bezels, and sometimes a lip) range from $450 to $950. A basic F-Sport-style PP kit usually sits near the low end.
LC-inspired FRP bumpers and niche designs push the high side. Rear conversions, like IS-F dual-tip setups, typically cost less—unless you’re also doing exhaust work to match.
Paint Isn’t Cheap—Especially If You Want It Done Right
If you’re painting the new bumper to match, set aside $300 to $800. Single-stage blacks or silvers fall on the cheaper end. Tri-coat pearls and factory metallics? That’s where things get pricey. Pro tip: Make sure the shop blends into the fenders for a clean match, especially on older cars.
Installation: Shop Rates Add Up Fast
If you’re going pro, expect $300 to $600 in labor. Shops charge more if they’re dealing with parking sensors, cutting liners, or wiring in new fog lights.
Some kits look plug-and-play but end up needing extra finesse to fit cleanly. Budget another $100 to $150 if your install involves sensors or custom harness work.
Hidden Extras: Don’t Forget the Little Stuff
Here’s what often gets missed: brackets, wiring adapters, fog light harnesses, or grille emblems. Depending on the kit, you might need to spend an extra $75 to $250. Read the fine print on the listing, and don’t assume everything shown in photos comes in the box.
7. DIY or Pro Install? Deciding Who Should Turn the Wrench
So you’ve picked your bumper kit. Now comes the big decision—do you tackle the install in your garage, or hand it over to the pros? The answer depends on your tools, time, and tolerance for troubleshooting.
Bolt-On Kits: Easier Than You Think—If It’s Truly “Direct Fit”
Some conversion kits are labeled as “direct bolt-on,” and for the most part, that’s accurate. You’ll need basic hand tools, jack stands, and a couple of hours.
Most of the job is removing old clips, transferring fog lights or sensors, and aligning everything before tightening it down. Car‑Act’s 4IS front conversion, for example, has solid video guides and walkthroughs—even for first-timers.
When It’s Worth Paying a Pro
If the bumper requires trimming your fender liners, modifying brackets, or rerouting wiring for fog lights and parking sensors, don’t wing it.
A shop that’s done Lexus conversions before can save you hours of headaches and give you a cleaner result. Bonus: most pros can heat-bend a bumper for better fitment, which is a trick home garages usually can’t pull off.
DIY Pitfalls: What Usually Goes Sideways
What are the top issues forum users run into during DIY installs? Uneven bumper gaps, misaligned sensor holes that trigger “Check Sonar” alerts, and paint chips from test-fitting before clear coat is fully cured.
If your kit comes unpainted, don’t install it first “just to test it”—you’ll scratch it. Always dry-fit, mark sensor holes, and get everything painted before final install.
8. Don’t Let Style Get You Fined: Know the Legal and Insurance Traps
Swapping bumpers might feel cosmetic, but state laws and your insurance company don’t always see it that way. If you’re not careful, your clean install could lead to failed inspections—or worse, denied claims.
How Low Can You Go? State Bumper Height Laws
Every state has a limit, and it’s not just about lift kits. Virginia, for example, says passenger cars can’t have front bumpers higher than 22 inches or rear bumpers over 23 inches (see §46.2‑1063).
Add a thick lip or drop your ride on coilovers, and you could cross that line without knowing. Illinois, Ohio, and West Virginia have similar rules. Always measure from the ground to the bottom edge of your bumper after installing any new kit.
Mods Can Void Your Policy—Unless You Declare Them
That sleek new front end? It just increased your car’s value—and your risk exposure in the eyes of your insurance provider. If it’s not disclosed and you file a claim after an accident, they might call it a “material misrepresentation.” Translation: you’re out of luck.
Some companies will still cover you if you declare the change, and they can assess its impact. It might raise your premium, but at least you’ll be protected.
Sensor Disabling? That’s a Bigger Problem Than You Think
Plenty of aftermarket bumpers ditch parking sensors or headlight washers, and owners disable them just to avoid warning messages. That’s fine for weekend show cars, but in the insurance world, it’s a liability.
You’re altering a factory safety feature. If a low-speed accident happens and your sensors were disabled, some policies may not cover the damage, or worse, claim you were negligent.
9. What Lexus Owners Are Saying: Real Talk from the Forums
Dig through the Lexus IS forums and Reddit threads, and you’ll find a goldmine of firsthand experience. Some swear by the visual payoff, while others warn about surprises they didn’t see coming until install day. Here’s what stands out.
Fitment Headaches: Not All Kits Are Plug-and-Play
Plenty of owners thought they bought a “bolt-on” bumper—until they lined it up and saw daylight between the fender and fascia. One common issue? Gapping near the headlights or uneven fit along the lower valance.
Several 3IS and 4IS conversions need minor bracket tweaks or shimming to get everything flush. And if your kit came without fog light brackets or the right grille mounts? Be ready for some fabrication.
Cheap Paint Isn’t Worth the Trouble
It’s tempting to save a few bucks by using a discount shop or buying a pre-painted bumper online. But forum after forum tells the same story: orange peel, off-color match, or clear coat that flakes in six months.
One owner had to repaint the whole front end after trying a $300 booth job. The consensus? Spend more on prep and paint once, or you’ll pay twice.
Favorite Brands—and the Ones to Avoid
There’s a short list of conversion brands that keep getting praise. Car‑Act and Ikon Motorsports come up often for their solid polypropylene quality and decent fit.
A few users also mention RacingBees for durable paint options. On the flip side, Nyc‑Bodykits gets flagged repeatedly for thin, brittle fiberglass and poor packaging. If you’re buying overseas, double-check return policies and part quality before pulling the trigger.
Sensor Hole Workarounds That Actually Work
Some of the more popular kits, especially 3IS-style conversions, come without pre-cut sensor holes. That’s not a dealbreaker—owners have found ways to adapt.
A $10 grille plug hack from Amazon or custom-drilled holes paired with aftermarket sensors have helped many retain parking assist without triggering the dreaded “Check Sonar” dash message.
10. Your Bumper Swap Cheat Sheet: Find the Right Path in Seconds
There’s no shortage of bumper options out there, but which one actually fits your IS250 goals, budget, and skill level? This quick flowchart cuts through the guesswork and gives you a straight answer.
Want a Subtle Refresh Without Going Wild?
Go with an OEM facelift swap from a 2011–2013 IS250. It keeps things stock-friendly and avoids sensor headaches. Perfect if you just want to shed that early-2000s look without going full F-Sport.
Craving the Sharp Look of a Newer F‑Sport?
The 3IS F‑Sport style kit hits the sweet spot. Affordable, aggressive, and widely available in PP plastic. Ideal if you want that 2014+ vibe but don’t care about original Lexus badges.
Gunning for a Show-Car Look?
The LC-style FRP bumper with a splitter isn’t subtle, and that’s the point. It’s lighter, angular, and instantly sets your IS apart. Just be ready for trimming, custom paint, and some pro fitment work.
Trying to Keep the Total Bill Under $1,200?
Stick with a bolt-on PP kit, handle paint, and install yourself. That combo can sneak under budget if you don’t need sensors or extra wiring.
Rely on Parking Sensors or Hate Warning Lights?
Choose a pre-drilled bumper kit with PDC support. Then have a shop handle the install and sensor calibration. Avoids the “Check Sonar” dash nags and keeps everything working.
11. Don’t Skip a Step: The No-Nonsense Install Checklist
Start With a Dry Fit and a Box Check
Before you touch a wrench, open the box and lay everything out. Verify that your kit actually includes what the seller promised—bumper shell, grille, fog bezels, brackets, and hardware.
Missing one push clip can stall your weekend. Once that’s done, do a dry fit. Mount the bumper without tightening anything to make sure panel gaps are even and mounting points line up. If it’s crooked now, it won’t magically straighten after paint.
Prep Your Components for the Swap
Transferring parts from the old bumper is where things get tricky. Move your temperature sensor, fog lights, emblem, and any sensors or brackets that don’t come pre-installed.
If your kit doesn’t have pre-cut holes for parking sensors, now’s the time to carefully mark and drill. Owners often use the old bumper as a template or rely on paper guides included in better kits. And if you’re adding a new grille, double-check the tab layout—it may not snap in without a few adjustments.
Secure Everything Down—The Right Way
Once it’s lined up and everything’s transferred, it’s time to bolt it down. Torque the bumper bolts to around 7 N·m. That’s snug, not gorilla-tight. Overdoing it risks cracking the tabs or stripping plastic threads.
Replace all push pins and underbody clips. Don’t cheap out here—those fasteners hold the lower edge of the bumper tight at high speeds and keep the fender liners from flapping around.
Wrap Up With a System Check
Before you call it done, plug in an OBD2 scanner and look for fault codes tied to fog lights, parking sensors, or headlight washers—especially if you’ve bypassed or relocated anything.
Also, test all lighting and sensor features manually. Don’t wait until your next rainy night or parallel parking attempt to find out something isn’t working.
Final Thoughts: What to Keep in Mind Before You Swap That Bumper
A bumper conversion can totally change how your Lexus IS250 looks and feels. It’s one of the cleanest ways to modernize your car without dropping cash on a full body kit or repaint.
The F‑Sport and 4IS-style conversions in particular deliver a serious visual punch, and the right kit can even add a touch of aerodynamic flair.
But looks aren’t everything. Some kits might need extra tweaks to make sensors work, others might clash with aftermarket headlights or cause clearance issues.
That’s why planning matters. From checking your state’s bumper height rules to knowing what your insurance will say if you get rear-ended with a custom setup—it all counts.
The bottom line is that if you’re going for a subtle OEM refresh, keep it bolt-on and stay within your year range. If you’re after something wilder, like LC or Esprit styling, just be ready to invest more time and money and maybe a few curse words during installation.
Either way, with the right prep and the right kit, this is one mod that can seriously bring new life to an aging IS.
Was This Article Helpful?