
Achieving a perfect paint job in automotive refinishing is all about the details. One crucial step often overlooked is sanding the base coat before applying the clear coat.
This process ensures a smooth surface for the clear coat to adhere to, resulting in a durable, glossy finish. Whether you’re a DIY enthusiast or a professional, understanding why and how to sand the base coat can make all the difference in your final results.
Let’s explore the ins and outs of this essential step in the painting process.

Why Sanding the Base Coat is Essential
Achieving Surface Smoothness
A smooth surface is critical for a flawless clear coat application. Sanding the base coat helps to eliminate any minor imperfections, such as dust particles or uneven paint application.
This step ensures the clear coat adheres properly without highlighting any flaws. The final finish can appear uneven and less professional without a smooth base.
Enhancing Adhesion
Lightly sanding the base coat is not just about smoothness; it also promotes better adhesion for the clear coat. The slight abrasion sanding gives the clear coat something to grip onto, resulting in a stronger bond.
This enhanced adhesion is key to a long-lasting, durable finish that withstands the elements and daily wear and tear.

✔ Complete Base Coat System – High-quality lacquer-based automotive paint designed for car and motorcycle refinishing projects.
✔ DIY-Friendly Formula – Ready-to-spray with no hardener or reducer needed. Fast drying and durable, perfect for at-home paint jobs.
✔ Quick and Easy Application – Dries to the touch in 1 hour, can be handled in 3 hours, and allows additional coats anytime without a re-coat window.
✔ Professional Results – Buffs easily to a brilliant, smooth finish. Available in a range of sheens from gloss to matte and metallic, ideal for custom or restoration work.
✔ Trusted Brand – Dupli-Color has been a leader in automotive appearance products since 1938, delivering easy-to-use, innovative solutions.
Steps to Properly Sand the Base Coat
Preparation
Ensure the base coat is completely dry before you start sanding. Rushing this step can lead to streaks and an uneven surface.
Use a tack cloth to clean the surface, removing any dust or debris that might interfere with the sanding process. A clean workspace is essential for achieving the best results.

✔ Complete 6-Piece Set – Includes six individually wrapped tack cloths, each generously sized at 18 x 36 inches, made from premium yellow/gold cotton cheesecloth.
✔ Outstanding Surface Prep – Specially designed with just the right tack to lift dust, lint, dirt, and sanding residue without leaving behind wax, silicone, or static.
✔ Versatile Use – Ideal for woodworking, auto painting, staining, sanding, cleaning, and prepping surfaces for a flawless final finish.
✔ Easy to Use – Simply open and lightly scrunch to gently wipe surfaces clean, ensuring contaminant-free finishes on wood, metal, and more.
✔ Professional Results – Trusted by hobbyists and pros alike for auto body work, furniture refinishing, and fine detailing before painting or staining.
Choosing the Right Sandpaper
Selecting the right sandpaper is vital. Use a fine-grit sandpaper, typically between 600 and 800 grit. This range is perfect for smoothing imperfections without removing too much base coat.
Coarser grits can be too aggressive and damage the paint, while finer grits might not be effective enough.
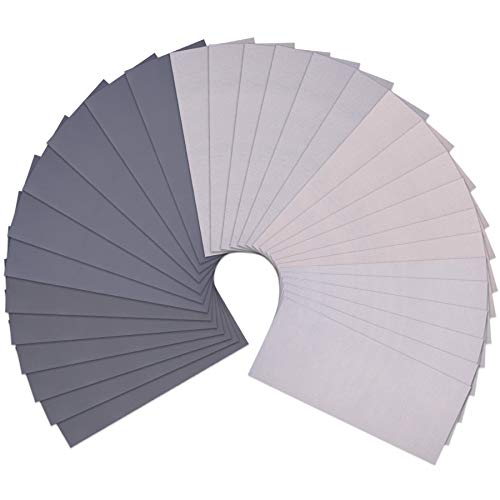
✔ Comprehensive Grit Selection – Includes 30 sheets with 5 high grits: 2000, 3000, 5000, 7000, and 10000, giving you the range needed for ultra-fine polishing and finishing.
✔ Generous Size and Flexible Use – Each sheet measures 9" x 3.6", easy to use by hand, with a sanding block, or cut down to fit specific project needs.
✔ Wet or Dry Application – Crafted from high-quality silicon carbide with nano-sand-planting technology, ideal for use with water, oils, varnish, shellac, or lacquer.
✔ Durable and Smooth Handling – Features a soft, electroplated backing for easy sanding without cracking, tearing, or losing grit.
✔ Versatile Polishing Set – Perfect for fine finishing on metal, wood, plastic, stone, jade, leather, and automotive projects.
Perfecting Your Sanding Technique
Wet Sanding for Best Results
Wet sanding is highly recommended for this process. It helps minimize scratches and control dust. Keep both the sandpaper and the surface wet throughout the sanding. This method reduces the risk of damaging the base coat and ensures a smoother finish.
Gentle Pressure for Even Results
When sanding, apply gentle, even pressure. The goal is to smooth the surface, not to remove the paint. Focus on creating a uniform finish without pressing too hard, which could lead to sanding through the base coat. Consistency in pressure and motion will help achieve the best results.
Final Cleaning
After sanding, thoroughly clean the surface again using a tack cloth. Ensure no residue or moisture remains, as these can interfere with the clear coat application. A clean, dry surface is essential for the clear coat to adhere correctly and provide a flawless finish.

✔ 2K Two-Component Formula – Combines hardener and clearcoat in one aerosol for professional-grade results without a spray gun.
✔ High Gloss, Long-Lasting Finish – Flows smoothly and dries to a durable, mirror-like shine that resists weather and chemicals.
✔ Exceptional Scratch & Abrasion Resistance – Offers maximum protection for basecoats with a tough, resilient surface.
✔ Easy to Use – Activate, shake, and spray with the unique nozzle that mimics a spray gun for even coverage and smooth flow.
✔ Ideal for Automotive Applications – Perfect for cars, motorcycles, and touch-ups, compatible with all basecoat systems.
Avoiding Common Sanding Mistakes
Over-Sanding Woes
One of the most common mistakes is sanding too aggressively. Over-sanding can expose the primer underneath, necessitating reapplication of the base coat.
This not only adds more work but can also compromise the final finish. The key is to be gentle and patient and not remove too much paint.
Inconsistent Sanding
Inconsistent sanding can lead to an uneven surface, which becomes obvious once the clear coat is applied. Maintaining a steady hand and consistent pressure throughout the process is essential.
Uneven sanding can create visible marks and ridges that detract from your desired smooth, professional look.
Applying the Clear Coat for a Perfect Finish
Preparation Before Clear Coat
Before applying the clear coat, inspect the sanded base coat closely for any remaining imperfections. Any small bumps or dust particles can ruin the final finish.
Ensure the surface is completely clean and free from any sanding residue or moisture. A tack cloth is perfect for this final wipe-down, ensuring a flawless surface.
Applying the Clear Coat
Even, Light Layers
Patience and technique are essential when applying the clear coat. Apply the clear coat in even, light layers. Follow the manufacturer’s instructions on drying times between coats. Rushing this step can lead to imperfections, such as runs or sags in the clear coat.
Avoiding Runs and Sags
To avoid runs and sags, apply the clear coat using smooth, steady strokes. Hold the spray can or gun consistently from the surface and move methodically across the area. This consistent motion helps ensure an even application and a glossy, professional finish.
Conclusion
Sanding the base coat before applying the clear coat is crucial in achieving a smooth, professional finish on your vehicle.
Proper preparation, the correct sanding technique, and careful application of the clear coat all contribute to a durable and glossy result. You can ensure a long-lasting and flawless paint job by avoiding common mistakes and following these steps.
Was This Article Helpful?

Very useful.
these are the steps i was looking for since this is my tail gate which everyone will look at