
Nu Finish claims that the Scratch Doctor can restore headlight lenses on their official website. They also mention that to do so.
You may need to apply some pressure and possibly use the product more than once to get the desired results.
If you are currently struggling with hazy and dull headlights, you are interested in giving Nu Finish a try. But before you order or buy some to use on the headlights, you should hear what we have to say.
Can Nu Finish Get Rid of Hazy Headlights?
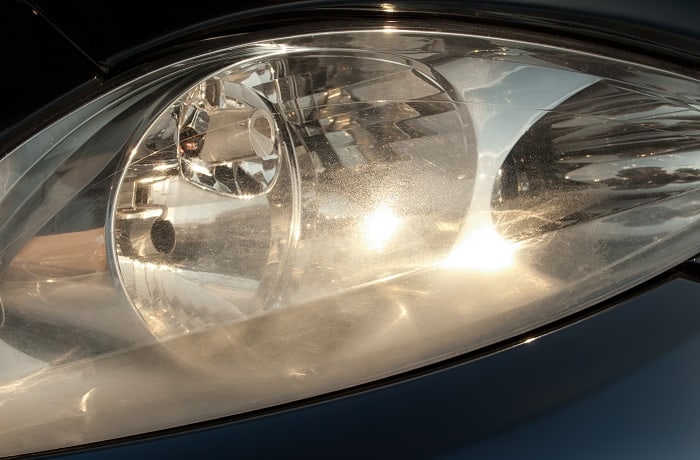
There are many things that car owners dislike. One of these things is foggy headlights. When a car is new, the headlights are crystal clear. Therefore, the light illuminated at night is quite bright.
Also, with clear headlights, the car looks beautiful. But when age catches up, the headlights begin turning foggy.
When that happens, car owners usually have two choices; take the headlights for a professional restoration job or invest in a headlight restoration kit and start scrubbing.
Taking the headlights for an expert restoration will cost you money, and so will buying a special headlight restorative kit. What if you have some Nu Finish that you had bought to use on your paint job? Can you use that instead?
The Nu Finish Scratch Doctor contains an adequate amount of abrasives that, when rubbed onto the headlights, can restore them.
Before we go any further, let’s be clear about one thing. Nu Finish won’t restore the headlights to exactly how they looked when the car was new.
It will get rid of some of the oxidation on the surface. Also, since it’s not a headlight restorative kit, do not expect mind-blowing results.
Therefore, if you are interested in a quick fix for foggy headlights, you can try Nu Finish. As the manufacturer described it, you will need to apply some pressure and use the product more than once.
Prepare for some elbow grease. It’s also useful to know that the final results heavily depend on the headlights’ state. If they were heavily oxidized, you might not restore them to as good as new.

✔ Eliminates Scratches, Scuffs & Swirl Marks – Targets surface damage like paint scrapes, haze, and swirls for a smoother, clearer finish.
✔ Versatile Use – Safe for cars, motorcycles, fiberglass boats, aircraft, and even chrome appliances around the house.
✔ Lab-Proven Performance – Tested and shown to outperform competing products in removing surface scratches.
✔ More Than a Scratch Fix – Doubles as a cleaning aid, removing bug residue and surface grime while restoring gloss.
✔ Easy to Apply by Hand or Machine – No fancy tools required—just apply, buff, and reveal the shine.
Is Nu Finish Better than Headlight Restoration Kits?
The best method of dealing with foggy headlights has been using headlight restoration kits for a while now. For those keen on aesthetics, you probably take your car to a detailer every once in a while for a professional headlight restoration job.
Irrespective of the case, if you consider using Nu Finish on the headlights, you are probably interested in finding out how they compare to restoration kits.
These kits are usually quite effective, especially if you get one from a reputable brand. Some of these kits are pretty expensive compared to Nu Finish. Unlike most of them, Nu Finish can be used on both headlights and paint jobs. It will, therefore, cut your costs significantly.
From a professional point of view, a specialized headlight restoration kit will work better than Nu Finish. Such kits feature a highly abrasive polish that cuts through the oxidation to restore foggy headlights.
Nu Finish was formulated only for paint. And unlike headlights, the paint job is often more delicate to abrasives. Therefore, Nu Finish isn’t as strong as most headlight restoration kits. The only advantage it may have over them is that it’s cheaper.

✔ Complete Restoration System – Includes disc pad holder, multiple sanding discs (500, 800, 3000 grit), quick clear coat wipes, and masking tape—everything you need to restore hazy lenses.
✔ Revives Headlights, Taillights & More – Designed for plastic lenses including headlights, fog lights, and directional lights to improve brightness and appearance.
✔ Advanced 3M Abrasive Technology – Removes yellowing, cloudiness, and oxidation without harming the lens surface.
✔ Flexible Use Options – Can be used by hand or with a household drill, making it easy for both DIY beginners and experienced detailers.
✔ Protective Finishing Wipe Included – Seals in clarity with 3M’s Quick Headlight Clear Coat for long-lasting UV protection.

✔ Complete 3-Step Restoration System – Includes oxidation remover wipes, sanding kit, and ceramic coating wipes to fully restore and protect your headlights—no power tools needed.
✔ Ceramic Coating That Lasts – The included ceramic layer chemically bonds to your headlight lens, delivering UV protection that lasts the life of your vehicle.
✔ No Tools, No Hassle – Everything you need is in the box. No drills, no risk of damaging paint or plastic—just a simple 30-minute DIY process.
✔ Restores Clarity & Prevents Yellowing – Wipes away haze and oxidation, while the ceramic coating prevents future fading and yellowing.
✔ Trusted by Industry Leaders – Made by Cerakote, a global innovator in ceramic polymer technology used in aerospace, defense, and automotive industries.
Should You Use Nu Finish on Headlights?
If you urgently need to clear your headlights from fogginess and hazing, and you happen to have some Nu Finish lying around, you can always use it.
But if you plan to buy Nu Finish specifically for the headlights, there are stronger and better alternatives. A headlight restorative kit should outperform Nu Finish by a considerable margin.
Therefore, feel free to use Nu Finish on headlights if readily available. But if you are interested in a more advanced product, consider something specially made for such a job. You will be much satisfied with the results.
How to Restore Headlights Using Nu Finish?
For those who have some Nu Finish lying around and would like to put it to good work, below is a quick guide on using the product to restore foggy headlights.
Step 1 – Gather the materials needed.
Fortunately, since this is a relatively simple procedure, you only need two things. The Nu Finish and a clean microfiber cloth.
Step 2 – Clean the headlights.
Before any restoration job, you should always attempt to clean the surface thoroughly. Do that and let the headlights dry. Or you can dry them with a clean towel.
Step 3 – Dab the Nu Finish on a clean microfiber towel and gently apply it to the headlights while exerting some pressure.
Keep on spreading the compound using a microfiber cloth. Some people use sponges because of their ease of use.
Feel free to choose either a sponge or a microfiber cloth. Keep on applying the Nu Finish till you achieve a haze. Let the product sit in the headlights for a few minutes.
Step 4 – Buff the surface of the headlights with a clean cloth.
You should reveal a much clearer headlight than the previous foggy mess. If you are not satisfied, you can repeat the procedure once more.
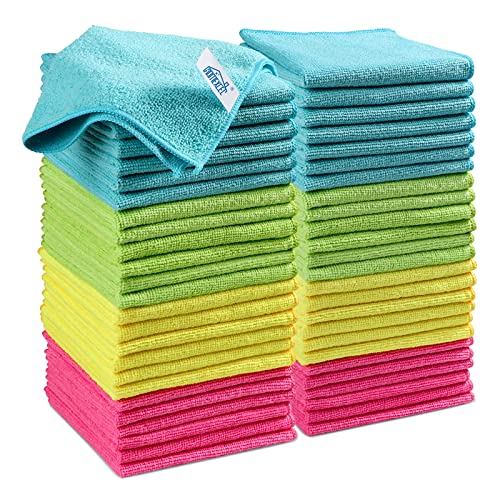
✔ Streak-Free & Scratch-Free Cleaning – Soft microfiber blend (87% polyester, 13% polyamide) lifts dirt and grime without leaving behind lint or damaging delicate surfaces.
✔ Ultra Absorbent & Quick Drying – Ideal for wiping spills, drying dishes, polishing cars, or cleaning screens—soaks up liquids fast with minimal effort.
✔ Durable & Reusable – Reinforced edges help these cloths withstand hundreds of wash cycles, making them a cost-effective, eco-friendly alternative to paper towels.
✔ Versatile 4-Color System – Color-coded (Green, Blue, Yellow, Pink) to help prevent cross-contamination across cleaning tasks (e.g., kitchen, bathroom, auto, electronics).
✔ Perfect Size for Any Job – Each 11.5" x 11.5" cloth is compact yet effective for everyday cleaning or detailing work—great for home, office, or garage use.
Can I Use Nu Finish as a Headlight Sealant?
You have successfully restored your headlights and would like to retain that finish for the longest time. Can Nu Finish come to the rescue? Being a sealant, Nu Finish can retain the new look of your headlights for a while.
Oxidation and UV damage will still occur in the long run. If you must use a sealant, we recommend going for one made for headlights. There are plenty of headlight sealants in the market that can get the job done much better than Nu Finish.
How to Restore Headlights Like a Pro?
The reason why you want to use Nu Finish is that you want to restore foggy headlights. What if we told you there is a much better and more effective method than using Nu Finish?
Sanding is the best DIY method of restoring foggy headlights. It doesn’t matter why your headlights are hazy in the first place. Sanding will cut through the oxidative layer and reveal a clear and clean headlight lens.
To accomplish this DIY project, you will need sandpaper sheets with the following grit levels: 2,000, 1,000, and 600. You will also need a plastic polishing compound and a UV-resistant sealant. You can safely store these products for future use.
With the above at hand, you can start by dry sanding the headlights with 600-grit sandpaper. Being the coarsest sandpaper, it will cut through the foggy layer. Make sure that you sand the headlights in a consistent motion.
For heavily clouded headlights, you may want to use something slightly stronger, such as 400-grit sandpaper. When the fog disappears, move to 1,000-grit sandpaper. But this time, wet sand it. That’s to ensure you get a more transparent finish.
Clean the headlights, and apply the plastic polishing compound followed by a UV sealant. Your headlights will have been fully restored. They will look cleaner and clearer than ever before. Unlike with Nu Finish, where you aren’t guaranteed results, sanding the headlights will ensure they are very clear.