
You don’t need fifteen years of experience to paint a front lip. All you need are the tools required to pull off this paint job and some professional advice. We won’t buy the tools for you, but we will give you professional advice on painting a front lip.
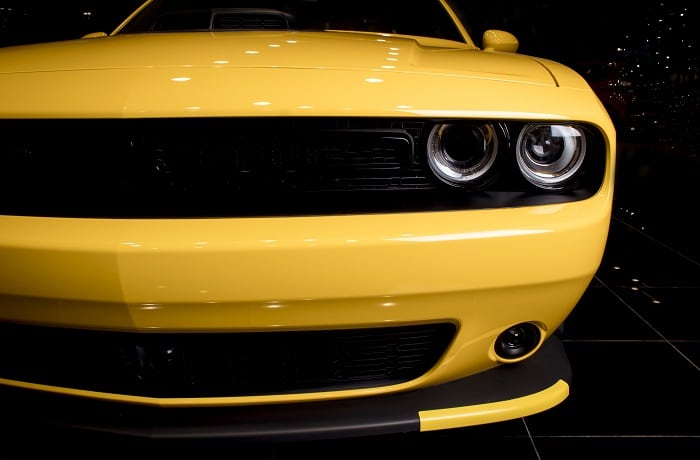
OEM front lips can make your car look sportier. Back in the day, only sports cars had a front lip spoiler. These days, anyone can install a front lip spoiler on their daily drives.
If you have a front lip spoiler and want to fit it in your car, you should paint it in a color that blends with the rest of your car.
If your vehicle is white, black, or green, you can paint the front lip to match that color. Without taking any more of your time, let us dive straight into our guide on painting a front lip.
Reasons Why You Would Want to Paint a Front Lip
There are a couple of reasons you may want to paint a front lip. The first is that you may have ordered a front lip and want to customize it to blend with the color of your car.
This is the most common reason why people paint their front lips. The other reason is that you already have a front lip, and it has been a victim of road rash, debris, mud, and other contaminants that it may have picked up along the road.
Due to its location, the front lip is quite vulnerable to wear and tear. This usually calls for a new paint job. Irrespective of why you are painting your front lip, allow us to emphasize how easy this job usually is.
Requirements Needed to Paint a Front Lip
To pull off this job, you will need the following;
1. An OEM front lip spoiler
2. Sandpaper, preferably medium to fine grit
3. Some soap and water

✔ 12+ Years of Trusted Quality – Atop-rated bestseller on Amazon since 2012, with 50,000+ glowing reviews.
✔ Thick, Dirt-Fighting Foam – Creates rich, soapy suds that lift dirt and grime for a scratch-free wash.
✔ Works with Any Wash Method – Perfect for buckets, foam guns, and foam cannons, delivering maximum foam power.
✔ Highly Concentrated Formula – Just1-3 oz. per wash is all you need for a deep clean and a streak-free shine.
✔ Smells Amazing, Cleans Like a Pro – Enjoy a fun, refreshing scent while making your car look brand new.
4. Solvent
5. Primer

✔ Prime Bare Metal in One Step – This 2-in-1 formula etches and primes simultaneously, creating the ideal surface for topcoats on bare metal, aluminum, or fiberglass.
✔ Trusted Rust Prevention – Built with Rust-Oleum’s Stops Rust® technology, it provides lasting corrosion protection for automotive parts and bare metal projects.
✔ Fast-Drying & Topcoat-Ready – Dries to the touch in just 10 minutes and ready for paint in 30 minutes, keeping your project moving without delays.
✔ Sprays at Any Angle – Equipped with any-angle spray technology and a comfort tip, this can delivers smooth coverage—even upside down.
✔ Professional Finish Made Easy – Delivers up to 12 sq. ft. of coverage with a flat finish that promotes maximum adhesion for a flawless topcoat.
6. Quality spray paint

✔ Anodized Look Made Easy – Transforms ordinary chrome or metal into a vibrant anodized-style finish with a brilliant metallic sheen—all in one step.
✔ Heat & Chemical Resistant – Formulated to withstand up to 500°F intermittently, making it ideal for under-the-hood parts, trim, and accessories.
✔ EZ Touch Fan Spray Nozzle – Offers smooth, even coverage and comfortable control for a professional-grade result on every application.
✔ Fast Drying Time – Dries to the touch in 30 minutes and is ready to handle in just 1 hour—perfect for fast project turnarounds.
✔ Versatile Use – Designed for use on automotive trim, grilles, engine components, motorcycle parts, and more—great for both interior and exterior projects.
7. Clear coat

✔ 2K Two-Component Formula – Combines hardener and clearcoat in one aerosol for professional-grade results without a spray gun.
✔ High Gloss, Long-Lasting Finish – Flows smoothly and dries to a durable, mirror-like shine that resists weather and chemicals.
✔ Exceptional Scratch & Abrasion Resistance – Offers maximum protection for basecoats with a tough, resilient surface.
✔ Easy to Use – Activate, shake, and spray with the unique nozzle that mimics a spray gun for even coverage and smooth flow.
✔ Ideal for Automotive Applications – Perfect for cars, motorcycles, and touch-ups, compatible with all basecoat systems.
8. A gas mask
9. A microfiber cloth
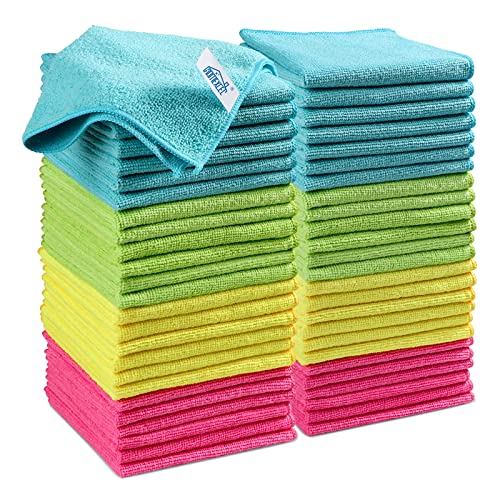
✔ Streak-Free & Scratch-Free Cleaning – Soft microfiber blend (87% polyester, 13% polyamide) lifts dirt and grime without leaving behind lint or damaging delicate surfaces.
✔ Ultra Absorbent & Quick Drying – Ideal for wiping spills, drying dishes, polishing cars, or cleaning screens—soaks up liquids fast with minimal effort.
✔ Durable & Reusable – Reinforced edges help these cloths withstand hundreds of wash cycles, making them a cost-effective, eco-friendly alternative to paper towels.
✔ Versatile 4-Color System – Color-coded (Green, Blue, Yellow, Pink) to help prevent cross-contamination across cleaning tasks (e.g., kitchen, bathroom, auto, electronics).
✔ Perfect Size for Any Job – Each 11.5" x 11.5" cloth is compact yet effective for everyday cleaning or detailing work—great for home, office, or garage use.
A Guide to Painting a Front Lip
Step 1 – Gather the Materials Above
You can get all of these items from an auto store near your home. Alternatively, you can order these items online and deliver them to your doorstep.
If you are working on a front lip already installed in your car. There is no need to buy a new one unless the current one is worn out.
That shouldn’t be a problem because the front lips aren’t very expensive. The same goes for the other materials you may need.
Step 2 – Set up a Working Area
Because of the shape of a front lip, you just can’t lay it on a table and start spraying. You will need to be creative when setting up a working area.
You can firmly suspend two metal poles or folding legs to hold the front lip. Feel free to use anything as long as it will support the front lip and suspend it in the air.
The working area needs to be enclosed so that the front lip isn’t contaminated.
Step 3 – Scuff the Surface
Using medium-level sandpaper, scuff the surface of the front lip. It would be best to use medium-level sandpaper to adequately rough up the surface and not eat into the front lip material.
The reason why we are scuffing the front lip using sandpaper is to promote better adhesion of the primer.
Even though dry sanding can work, it’s better to wet sand the front lip. You will realize less resistance when you bring some water into the sanding process.
Step 4 – Clean the Front Lip
Once the surface is adequately sanded, bring in some soap and water. Clean the front lip until it is free of any contaminants or debris that can affect primer adhesion. You can use a sponge for better results. Dry the front lip before moving on to the next step.
Step 5 – Spray Three Coats of Primer
After cleaning and drying the front lip, the next step is to spray the primer. Before we proceed with how to go about this method, you should know that certain OEM front lips come when they have already been primed.
Please confirm with the manufacturer. You can dive straight into painting because the front lip has already been primed.
But if it hasn’t, you must prime it first. Primer ensures better adhesion of paint. Failure to spray primer can shorten the lifespan of your paint job.
Spraying primer is fairly easy. You will need to spray at least three coats. If you are painting on a sunny day, give each coat at least ten to fifteen minutes to dry. If it’s cold, you can take a break of thirty minutes in between coats.
Step 6 – Wet Sand the Primer
There will be a lot of sanding involved if you want a decent finish. Therefore, once you have sprayed three coats of primer, you should give it at least one hour to cure before wet sanding.
Please note that different manufacturers have varying primer curing durations. Confirm on the primer’s label how much time it needs to cure. If you are not in a hurry, you can wait a day to wet sand the primer.
After confirming the duration needed for the primer to cure, wet sand it using medium-grit sandpaper. Since you are working on a front lip, you won’t need a lot of elbow grease. Wet sand until the surface is nice and smooth.
Step 7 – Spray a Solvent of Your Choice and Dry It Up
After you are done wet sanding, clean up the pieces of primer left on the surface. Then spray a solvent and wipe it clean with a microfiber cloth. Why should I use a solvent?
The purpose of a solvent is to remove any grease or wax that may prevent paint from adhering. Even though most people skip this step, if you want a decent finish, you should spray a solvent on the surface.
Step 8 – Spray Your Paint of Choice
This is where things get serious. Grab your spray paint, shake and point it towards the front lip and start spraying.
If it’s your first time, you may want to practice on another object till you get the hang of it. Please wear a mask because breathing the paint contents is harmful to your health.
Start with a light coat, making sure that you evenly spray the front lip. Ensure that you hold the spray can at a safe distance. Holding it further away can lead to paint wastage.
And at the same time, if you point it too close, the paint may run and ruin the finish. Spray at least three coats to ensure the finish is deep. Give the coats a drying time of ten to fifteen minutes.
Step 9 – Wet Sand If There are Imperfections
We are not anticipating imperfections, but there will be some if it’s your first time. Wet sand with ultra-fine sandpaper. Once the imperfections are dealt with, apply the final coat and let the paint dry.
Step 10 – Spray a Clear Coat
Wrap up your paint job by spraying a can of clear coat. A layer of clear is crucial as it protects the paint from the elements. It also adds gloss to your front lip, which is crucial if you are adding it to boost the aesthetics of your car.
Let it dry for a day or two before installing it. We understand that you may be excited to install your newly painted front lip and show off your car on the streets. But if you do it in a hurry, the paint will come off.
What Color Should I Paint My Front Lip?
In most cases, the front lips are usually painted the same color as the bumper. If your bumper is red, so should the front lip. However, black is more of a universal color for front lips.
You have probably seen a black front lip spoiler on white, blue, red, and even black cars. It is the conventional color.
The choice of what to paint your front lip is entirely yours. You can decide to match colors or be unique and blend with a different color. It’s all up to you.
Is It Better to Buy a Front Lip in the Color that I Want?
When it comes to front lips, there are two options. You can buy one and paint it yourself. This option is usually cheaper and more fun because you can customize your front lip with a color that suits your preferences.
The other option is to buy an already-painted front lip. In this case, you can choose the bumper to be delivered in the color you want.
The latter option is much faster and doesn’t require you to engage in any form of painting. The problem is that it lacks room for customization.
Painting the front lip bumper is ideal for detailing enthusiasts who have some painting experience. On the other hand, if painting the front lip seems like a lot of work, you can buy it when it’s factory-painted.