
More and more truck owners are turning to Raptor Liner to protect their truck bumpers, rims, and beds. According to the product’s website, the bed liner can withstand the toughest weather conditions and is resistant to stains, scratches, UV, and common fuels.
It can also be applied to a wide variety of substrates, including composites, plastics, plaster, concrete, wood, and steel. But can you spray Raptor Liner over Chrome?
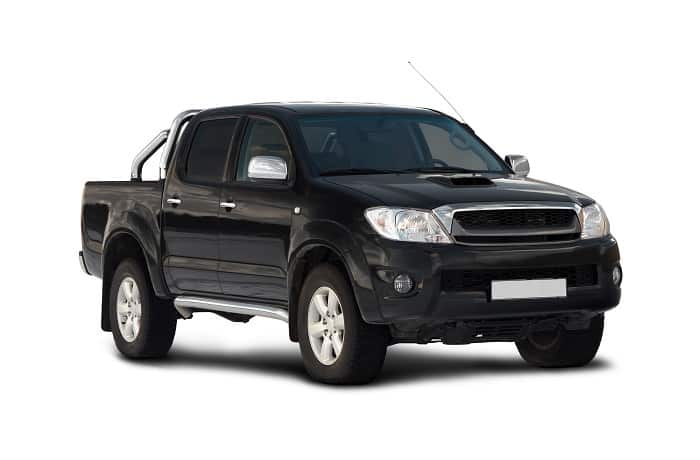
Unfortunately, you cannot spray Raptor Liner directly over chrome since chrome is extremely smooth.
Its texture prevents it from bonding completely with the bed liner, and the finished coat might not offer your truck the protection it needs. The good news is that you can still apply Raptor Liner to a chrome surface if you perform the correct prep. Let’s dig deeper into this.
Understanding Chrome Paints
Chrome is a paint product designed to produce a mirror-like finish on a wide range of surfaces. There are many types of chrome paint – all providing different effects depending on the application.
In our case, we are only interested in the chrome paint intended for use on vehicles or metals only.
Chrome does not usually have a strong, distinctive color. You will notice that it slightly reflects the color of your truck’s finish, depending on the thickness of the coatings. This means that you should only ever apply chrome to already painted surfaces.
Overall, chrome is very smooth and shiny, giving your car that new and polished aesthetic look. Many truck owners leave it at this, but others go the extra step to add a bed liner.
What Is Raptor Liner?
Raptor Liner is a bed liner kit that contains all the materials you need to create an ultra-hard coating over a truck part or surface.
Once sprayed, it can protect bare metal from rust, UV, scratches, and chips. It differs from other rival bed liners in both look and texture.
Previously, the bed liner was sold as molded plastic that you could place inside your box. This configuration meant that the products had to be pre-manufactured for certain trucks, which in addition to shipping, made them very pricey.
Raptor Liner uses a spray-on formula that, upon application, directly bonds with your truck’s contours. There are no air gaps between the bed liner and your vehicle, which means you do not lose any cargo space.
Even better, Raptor’s chemical formula allows it to bond with several pigments and dyes so that you can retain your vehicle’s original color.

✔ Heavy-Duty, Long-Lasting Protection – Forms a durable, UV-resistant urethane coating that withstands scratches, rust, stains, and extreme weather—perfect for truck beds, undercoating, trailers, and more.
✔ Complete 2K Kit – Includes 4x 750ml bottles of black liner base, 1x 1L hardener, spray gun (8 CFM @ 50–60 PSI required), and full instructions—covers a 6 to 8 ft truck bed.
✔ Quick & Customizable Application – Fill, shake, and spray using the included gun, or use a brush or roller for custom textures. Dries fast, allowing multiple coats in under an hour.
✔ Flexible & Sound Dampening – Maintains impact resistance and flexibility, helping reduce vibration and road noise while preventing corrosion and chemical damage.
✔ Trusted Performance by Raptor – Backed by Raptor’s reputation in automotive refinishing, this kit delivers a professional-grade finish trusted by DIYers and pros alike.
How Does Raptor Liner Protect Your Truck?
Raptor Liner protects your truck’s metal surfaces. It dries into an ultra-thick layer that is resistant to chipping and cracking, even when off-roading, and UV-related fading. Its best attribute, however, is its ability to disperse pressure.
A coating of Raptor Layer is flexible enough to disperse pressure from any load thrown into your bed and prevent damage.
This elasticity also allows it to maintain a firm grip on all surfaces with which it is bonded. The result is an all-around stronger, more-resistant truck.
How to Spray Raptor Liner Over Chrome
If you have decided to cover the chrome parts of your truck with a bed liner, you need to understand that these two materials do not readily bond.
You need to prep properly.
Without the proper prep procedure, your bed liner will not adhere to your chrome door handles, bumpers, or trim.
There are several ways you can coat chrome surfaces with bed liners. The following procedure is fairly simple to follow. It consists of these five steps:
- Step 1: Rough Up the Chrome
Since the main reason, Raptor Liner does not bond with chrome is the smooth surface, you need to get rid of it first.
Your best bet here is to use an aggressive medium to create a coarser texture. 80-grit sandpaper or higher will do the best work. It will ruin your chrome finish, but this is necessary for bed liner application – painful as it might be.
You can speed up the sanding process by using a wire wheel attached to a drill or a power sander. Both options are faster and get the job done just as well.
Whichever way you go, make sure not to skip any parts and to go over the entire surface. The Raptor liner will peel if it cannot ‘grab’ the metal surface, so ensure you create deep scratches across the chrome finish.
- Step 2: Apply Tape
Think of applying bed liner-like coloring within the lines – you need to stick to the margins of the intended surface, or else the finished product will not make sense.
The tape helps with this. To ensure you get clean lines, run several strips of tape where you would like your Raptor Liner to stop. Consider stretching the tape out approximately a foot past the sticking point for a sharp finish.
- Step 3: Apply a Self-Etching Primer
Once you have ‘roughed up’ the entire surface and lined the margins with tape, you should apply a self-etching primer.
The primer should prepare the metal surface for bonding so that it does not react with the bed liner. It will also improve the quality of your bed liner coat since it acts as an adhesion promoter.
When choosing a primer, it will ultimately come down to your preferences. Many self-etching primers produce good results as long as they are used as the manufacturer intended.
Don’t go overboard with the application – a single thin coat will etch the surface and create a strong enough bond.

✔ Prime Bare Metal in One Step – This 2-in-1 formula etches and primes simultaneously, creating the ideal surface for topcoats on bare metal, aluminum, or fiberglass.
✔ Trusted Rust Prevention – Built with Rust-Oleum’s Stops Rust® technology, it provides lasting corrosion protection for automotive parts and bare metal projects.
✔ Fast-Drying & Topcoat-Ready – Dries to the touch in just 10 minutes and ready for paint in 30 minutes, keeping your project moving without delays.
✔ Sprays at Any Angle – Equipped with any-angle spray technology and a comfort tip, this can delivers smooth coverage—even upside down.
✔ Professional Finish Made Easy – Delivers up to 12 sq. ft. of coverage with a flat finish that promotes maximum adhesion for a flawless topcoat.
- Step 3: Spray the Raptor Liner
The next natural step is to spray the Raptor Liner onto the prepped surface.
You should begin with the can painted away from your truck, then slowly and smoothly move your hand over the surface. This should be easy for you if you have painted a vehicle before or seen someone do it.
Raptor Liner goes on very thick and does not pool or bead up like paint.
The recommended amount is two coats, but you should try to make the first one very light. In some cases, this first coat will appear splotchy or uneven. Keep going anyway, moving your hand in smooth, even, and fast motions.
During the second coat, you can now slow down and lay the Raptor Liner down thicker. This second layer will be smoother and more even since you have already laid down an initial layer.
Note: Some people achieve remarkable results with a single coat by increasing the air pressure. However, I believe that two coats produce the most professional finish possible.
- Step 5: Inspect Your Work
Finally, it is time to inspect your work. You can do this yourself or ask someone you trust to look it over and check for small areas you might have missed.
If you find any, touch them up immediately before the rest of the Raptor Liner dries. You can even bring your truck outside and use the bright light to check for imperfections in the coating.
How Much Air Pressure Should You Use?
Raptor Liner kits come with a compressor that you can attach to the back of your paint bottle and gun screws that go on top.
Usually, the amount of air pressure you use when spraying this bed liner determines the quality of the finish. A typical finish should feel rough and patchy.
In my opinion, the rough and patchy finish has the best consistency. The rough texture helps keep things in place in your box, preventing them from sliding around when you are on the move.
That said, if you prefer a smoother finish, you can set the air pressure to about 100 PSI.
The manufacturer recommends an air pressure of 50 PSI, which is ideal for use on your truck bed. If you are using Raptor Liner for your bumper, door handles, etc., you can use a lower pressure of about 30 PSI.
Safety Tips for Spraying Raptor Liner Over Chrome
Bed liners, including Raptor Liner, tend to release harmful fumes. If you have chosen the DIY route, it is important to take the necessary safety precautions to ensure you do not endanger your health.
Although advisable, wearing a protective suit is optional, but you should always wear a respirator.
You can purchase a proper respirator at any hardware store or use the basic paper respirator included in the Raptor Liner kit. Make sure it has a tight seal, and tie a knot in the elastic band when using paper respirators to make them fit tighter.
Not everyone can use a paper respirator safely, which is especially true if you are not clean-shaven. You can test the fit of your mask by wearing it and then taking a deep breath through your mouth and nose.
If the mask is sufficiently tight, you should feel more resistance than usual. Cool air flowing in through the sides is a sign of a bad fit. It means you should tighten your mask.
Lastly, if you are spraying your truck indoors – as most people do – remember to turn on the AC or open your garage window for constant circulation of fresh air.