
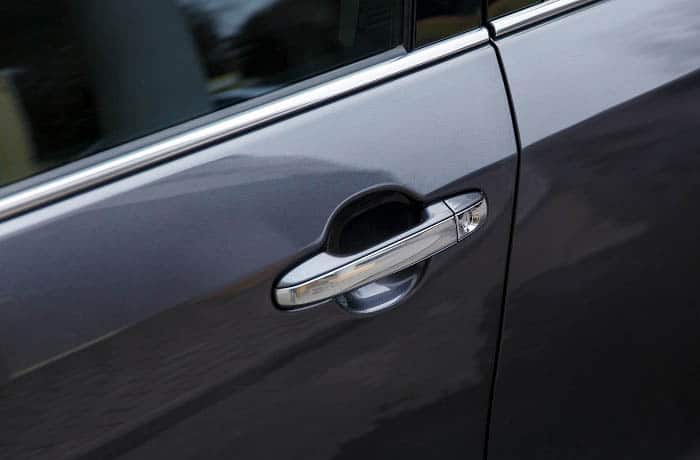
Before we can even get started with how to paint over chrome plastic, we must define what chrome plastic is. This is when plastic is placed in a vacuum chamber, and aluminum is vaporized into it using electric filaments.
Plastic chrome plating has become a common practice, and if a plastic part of your car has been chromed, it is bound to fade and wear out after a while. If this happens, you may consider painting over the old chrome plastic.
In today’s post, we will discuss if it’s possible to paint over chrome plastic, how to do it, and whether the paint will adhere to it.
Can You Paint Over Chrome Plastic?
Not directly. Chrome usually isn’t an ideal surface to paint over, more so if it has been attached to plastic.
If you want to paint over chrome plastic, you must remove the chrome and then paint on the plastic surface.
That is the only way the paint will hold. You can decide to paint directly over the chrome plastic, but the finish will be terrible in most cases, and the paint should chip or peel off in months.
Instead of wasting your time and effort only for the paint to peel, we would advise you to follow the right steps to remove the chrome from the plastic and then paint it.
How to Paint Over Chrome Plastic?
This is a project that will require a lot of time and effort. Therefore, you must be well prepared. Even though it is time-consuming, painting over chrome plastic isn’t difficult. Here is what you will need to do;
1st step – Scuff the chrome plating from the plastic
We have already mentioned that chrome plating isn’t ideal for painting. That’s why you have to get rid of it first before doing anything else.
Using a Scotch-Brite pad, scuff all the chrome plating on the plastic. If the chrome had started wearing out, it would have come off much more quickly.
This may take some time, especially if you are working on a large surface area. Asking for some help can ensure you get this job done faster.
2nd step – Sand the remaining residue and plastic
Please do not assume that the plastic is ready for paint after scuffing it with a Scotch-Brite pad. You still need to sand the residue and the plastic.
Fine-grit sandpaper should remove any residue left behind. In the process, you will also be roughing up the plastic surface to promote better paint adhesion.
The reason why painting over plastic is so tricky is that it has a smooth surface. This makes it harder for the paint to adhere. When you sand the plastic, you are preparing the surface for the next step, primer application.
3rd step – Apply some quality primer
The next step is to primer. Primer prepares a surface for paint since it also boosts adhesion. Plus, primer makes sure the paint job has an impressive overall finish. Considering that you are painting on plastic and not metal, you need a special plastic primer.
A plastic primer will bond much better to a plastic surface. Alternatively, you can use an adhesion promoter. That also serves the same purpose. Give your primer some time to dry before moving on to the next step.
Follow your manufacturer’s instructions regarding the required drying time for primer or adhesion promoter.

✔ Bonds to Tough Plastics – Specially formulated to adhere to PVC, polypropylene, vinyl, resin, fiberglass and more.
✔ Boosts Paint Adhesion – Prepares smooth plastic surfaces for topcoats, ensuring lasting paint hold.
✔ For Indoor & Outdoor Projects – Ideal for garden furniture, planters, or plastic fixtures—works indoors or out.
✔ Quick-Drying & Easy to Use – Simple aerosol application and fast dry time make it a go-to for DIYers and pros.
✔ Made in Britain – Trusted British-made quality with a reputation for reliable performance.

✔ Prepares Tough Surfaces for Paint – Boosts paint adhesion on plastic, fiberglass, chrome, aluminum trim, and bumpers.
✔ Fast-Drying, Easy-to-Use Formula – Dries in 20 minutes and can be handled in just an hour—perfect for same-day projects.
✔ Covers Evenly with EZ Touch Nozzle – Fan spray tip delivers smooth, controlled application for clean, even coverage.
✔ Interior & Exterior Ready – Ideal for prepping surfaces inside and outside your vehicle, ensuring paint sticks and stays.
✔ Trusted Since 1938 – A go-to in garages for decades, Dupli-Color delivers professional results without the hassle.
4th step – Spray quality paint
Once the primer dries, you can spray your favorite paint. Even though primer gives you a lot of flexibility on the types of paints you can use, including regular paint. You should stick to plastic paint.
These types of paints have been specifically formulated for use on plastic surfaces. Therefore, there won’t be any compatibility issues in the future. And it should hold on for much longer than ordinary paint.
There are tons of plastic paints in the market. Good examples include Rust-Oleum specialty plastic paint and Krylon Fusion for Plastic.
These are products that have an excellent reputation amongst car detailers. For the paint to look better when it cures, give it at least three coats.
On a plastic chrome surface, you should avoid spraying many coats. Plastic is a flexible material, and when it contracts or expands, it can cause paint to crack or chip. Such issues can be avoided by using paint made explicitly for plastic surfaces.
5th step – Spray a layer of clear coat
Do not forget to spray some clear on the paint to get a more appealing finish. You can also wax it after. This will protect the clear coat from wearing out.
DIY vs. Professional Chrome Plastic Painting
Both options have their pros and cons. You have to evaluate which one appeals the most to your situation.
When you take your car to a detailer for professional chrome plastic painting, you will spend more money than you would have if you were to do it yourself.
However, since detailers are skilled at doing this, you are assured of a quality paint job that will withstand the test of time.
Plus, the finish may be a whole lot better than the one done by a Do-it-yourselfer. The only drawback of hiring someone to paint over a chrome plastic component on your car is that you will spend more.
If you enjoy painting and have some experience with such a project, you can do it yourself. As you have seen from the step-by-step guide above, this is a relatively easy project.
Yes, it may take some time and effort, but you will be impressed by the final results. Plus, how else are you going to learn such skills without experimenting?
Can I Use Self Etch Primer on Chrome Plastic?
Not at all. Self-etching primer is a coating formulated to prevent rust and corrosion on metal. Plastic doesn’t rust; therefore, it shouldn’t be coated with self-etching primer. The best primer for plastic is one that is specifically made for such a surface.
The Importance of Surface Preparation When Painting over Chrome Plastic
It’s not just chromed plastic, but all surfaces about to be painted need to be well prepared. Regarding chrome plastic, if you don’t get the preparation right, the paint won’t last for long. Therefore, surface preparation is crucial.
But, what do we mean when we talk about surface preparation? This involves a bunch of activities that aim to prepare the chrome plastic for painting.
For instance, the first step in preparing chrome plastic for painting is cleaning it. If the chrome plastic is in a component such as the bumper, it has received its fair share of exposure to dust and dirt.
It is essential to remove any contaminants that may affect paint adhesion. You should clean the chrome plastic thoroughly using a strong detergent and lots of water.
We already talked about sanding in our guide on painting over chrome. Sanding helps remove chrome from the plastic surface and prepares plastic for paint application.
When sanding, always start with heavy grit sandpaper and work towards finer ones. It is important to sand a chrome plastic surface till you can no longer see the shiny stuff.
When sanding, always use a cloth to wipe off the chrome residue. This will help you track your progress. Because at times, you may not know that you have removed all the chrome if you still see shiny stuff on the surface.
Another integral part of surface preparation is filling damaged areas on the plastic. Let’s assume that you are painting on a plastic bumper.
If there are dents or holes, you must repair these damages using a plastic filler. That sums up all that is involved when preparing a chrome plastic surface for painting.
How to Remove Chrome Plating from Plastic?
When painting over chrome plastic, removing the chrome is essential. To some people sanding the chrome away may seem complicated and time-consuming.
Well, there are other ways you can remove chrome from plastic. However, you will have to sand the plastic to promote paint adhesion at the end of the day.
1. Hydrochloric Acid
The most convenient way of removing chrome from a plastic surface is using hydrochloric acid. This acid eats away the chrome plating leaving the plastic by itself.
For this to work, you should dip the chrome plastic in a bucket of hydrochloric acid and give it some time for the reaction to occur.
When the acid eats away the chrome, you can rinse the plastic and install it where it was initially. This is an effective method. However, the problem is that it’s not applicable when dealing with a big object such as a car bumper.
2. Strong Detergents
Some detergents are made using powerful ingredients. A good example is the Mr. Muscle Professional Floor Cleaner. This should get rid of the chrome and leave the plastic unharmed.
3. Soda Blasting
This is an alternative to sandblasting, which is safer for plastic. It entails using compressed air to blast sodium bicarbonate particles into chrome-plastic surfaces.